Greetings fellow propagators and aspiring propagators of the DGC. The purpose of this piece is not to tell anyone how they should clone cannabis or the way I clone is better than any other. I want every grower, in every situation, to understand the fundamentals of cloning so they can apply them to their prefered method. I will cover how to clone but I will focus more on what to do until the cut’s have rooted and are ready to be transplanted. Caring for the cut is just as important as the technique or system used to clone it. Our goal as growers should be to understand the plant. Some of the principles I want to explain would get us side tracked though. Understanding the plant and it’s rhizosphere (root zone) is important in the context of this piece so I will go into some technical mumbo jumbo. I don’t want to lose new growers so I will explain most thing’s in layman’s terms. I will first start off by saying I am not happy with anything less than 100% of my cuts rooted and neither should you. If you’re going the all natural route only using calcium and trace elements and/or using natural auxins and cytokinins (hormones) found in the aloe plant for example, then you can not expect 100% rooted cuts. You can take a cut, stick it in a small pot of soil with a zip-lock bag over it and cross your fingers. Every cut I make better root otherwise why did I take it? Some plants do not like to root as fast as asked. Thankfully this is not common. Plants that make trouble don’t last long in my garden. Especially now with so many option’s to choose from. Making babies should not test your patience like your actual children. 😉

Mommy Dearest

Healthy clone’s start with healthy mother plants so before I go into cloning techniques, I want to talk a little about caring for mum. UK shout-out. 😉 I prefer my mom’s to be short and wide with thick stalks just like my flowering plants. I’m not as aggressive with my mother’s because they will not hold bud weight. The technique is the same whether I’m growing a mother plant with a certain number of branches to produce a certain number of clone’s or a flowering plant with a certain number of branches that will fill a space with bud. Timing is crucial and I’ll bring it up often. Mother plant’s don’t need much. If you’re Real DGC you’ve heard the steak and potatoes analogy in term’s of mineral nutrition. In terms of the plant as a whole I think of light being the steak, the environment being the potatoes, and the nutrients are actually the vitamins and minerals we feed the root system. Mothers need a light to grow that can be kept close with low heat so the branches don’t stretch or stress from heat. Fluorescents and leds are very popular choices for mothers and clones. Large scale mothering operation’s and growers with a few lights that need to be multipurposed might go the High Intensity Discharge (HID) lighting route for coverage or it’s all they’ve got. HID lights like metal halides (MH) are more popular than high pressure sodium (HPS) lighting for mothers because plants tend to form tighter internodal spacing under the cooler blue color temperature and tend to stretch more under the warmer orange light of HPS. I want a full spectrum personally that has a little more blue (4500-6400k) in the vegetative state and a little warmer (3000-4500k) in the flowering state. Color temperature is measured in Kelvin (K). The warmer the light source then lower the kelvin number. I think the perfect all around light indoors is about 4000-4500k if I could only have one for everything. We want to blast our flowering plants with light unlike our cuts that we do not want to blast with intensity. If your light is too intense, the cut’s will really want to lay over. I keep a T12 two tube fixture damn near touching the dome and a two tube T5 about 10″ above dome. LED’s will vary depending on diodes used. Most low watt led’s can be 6″ or so away from dome. HID’s need to be 24″ plus depending on wattage.
My six tube T5 fixture’s have staggered cool and warm tubes for a nice spectrum over my mother plants. Two 54 watt tubes can easily cover 3 domes full of clones.

Feeding mothers a nice balanced diet with an even N-P-K is a good choice that’ll help clone’s root fast. In the simplest explanation (N) Nitrogen aid’s in leaf and stem growth, (P) Phosphorous aid’s in root and bud formation, and (K) Potassium aids in the overall health and the plants immune system. We don’t want to pump our mothers full of nitrogen before the cloning process or ever really because we don’t want to promote leaf and stem growth – we want roots. Something to keep in mind when growing a mother plant. If you don’t need clones weekly I don’t see a reason to speed up any of the plant’s processes. Tight and sturdy is my goal.
This young seedling could become a mother if she survives my pheno hunt cut. She’s 8″ tall split to 8 main branches right now. Getting pretty thick stem’s too.

Young seedling mother’s before pheno hunt round 2. The three plants of eight that made it out of pheno hunt round 1 are in the front row. Round 2 will have 8 clones off each plant for the next test. Before the chop.

After the chop.

It was a close shave keeping the branch sites on this plant after cloning. Tight and sturdy at all costs. lol

The process of cloning is a fairly simple one. I will note that I like to do it early morning. I probably read some plant science article years ago about cloning that mentioned doing it at first light that probably has just become habit. It probably really doesn’t matter when you make cuts. But before we make our first cut we must first always remember to clean and sterilize all tools and wash our hands before starting. I soak my tools in alcohol and wash my hands with soap. I use scissors to make cuts and trim leaf tips so it needs to be razor sharp (or use a razor) to make clean cuts that don’t crush the stem. This means I have to make damn sure I scrap them good before/after each time I use them before I put them in the alcohol to soak.
Some of the things I use when cloning.

First thing I do is grab my trusty 5 gallon bucket. If you’re cloning aeroponically then only some of the next few steps will pertain to your situation. Depending on how many clones I’m going to make will determine how much it’s filled. I use rockwool starter cubes so they’ll get a soak in the bucket but not before I mix a foliar. Rockwool will clog a sprayer quick. In the bucket I will initially add 1-2 ml per gallon of a light nutrient solution (I love Grow More’s 5-10-40 bloom blast), a pinch of Recharge, and 5-10 ml per gallon of a wetting agent like Optic Foliar’s Transport. I stir it up real good then fill my spray bottle/s. I will then mix one separate spray bottle with this mix. Initially and about 3-4 day’s later I’ll spray them with this mix that has a little more kelp. I’ll explain why later. Once my spray bottles are filled then I can add a few things for the cubes to soak up that I don’t want sprayed on the clones. I’ll add 1 tablespoon per gallon of insect frass, a few drops of indole-butyric acid (IBA) rooting hormone, and 2 ml per gallon of Recharge. I mix it real good, add an air pump/stone or O2 Grow, and let it brew for about 2-4 hours with the cubes in soaking. If this mix is going in a clone machine then you’ll need to change it regularly (every 3 days) if adding biologicals like in Recharge.

I seen a cat on the internet one too many time’s. Here’s one more meow. 😉
I have not brought up potential hydrogen (pH) yet because I want to go over it a bit. Basically the acid to alkaline scale goes from 0 to 14 with 0 being most acidic, 7 being neutral, and 14 being most alkaline. Cannabis roots prefer a slightly acidic solution/medium to properly exchange ions. Depending on the medium if any will determine the best pH to ensure roots are able to absorb the minerals known as the cation-exchange capacity (CEC) pronounced cat-ion-exchange capacity alrighty meow. In layman’s terms meaning buffer between medium and roots. I’ll talk more about root structure in another article but I do want to mention a few things. Roots form differently depending on the medium. Seedlings have a tap root with feeder roots that come off it to collect minerals. The ion exchange only happens at the tip of the feeders. Clone’s have many tap roots with feeders off each. The feeder roots form differently because of the different environments they live in. In an amended soil or living soil the feeders need to be long to search out minerals. In hydroponics roots will often form fat tap roots with short feeders because minerals are delivered like pizza. I love pizza. Hint hint Scotty.
Healthy tap root’s poppin’ out!

Soil has a high CEC buffer and inert mediums like rockwool have a low CEC of actually zero. No buffer. This is important to know when growing and cloning so when roots do initiate, they can do their thing efficiently. Using biologicals aids in this efficiency. It can be important in a foliar if you are cloning in a tray like me and that overspray drips down wetting the medium possibly affecting pH at some point. So I adjust the pH my foliar at 6.0. I want my rockwool cubes pH to be at 6.0. In an inert medium 6.0 is boss for root growth. My initial pH in my bucket will be around 5.5 to start and as the neutral cubes soak in it a few hours the rockwool’s buffer lowers from 7.0 to 6.0 before I put my cuts in them. Cloning in soil? Ph is not much of a concern for you unless your source water is high and the bennies are not established yet. Understanding the different pH ranges the minerals are best absorbed at will ensure victory. Nitrogen is best absorbed at a little lower pH and phosphorous is best absorbed at a little higher ph. I’ll briefly explain the three types of grows. 100% salt based with no biologicals, salt/organic mix with biological aid, and 100% biological. 100% salt based needs a pH range of 5.5 to 6.0 to get the N in early and finish with the P. Keeping it 5.8 start to finish will work great but raising it throughout the weeks will bring your garden over the top. In coco with a slightly higher CEC than rockwool you want to start at 5.8 and finish at about 6.3 for best results depending on the chelation of your nutrients. Most know that soil is fine neutral but if you start at 6.5 and finish at 6.8 you’ll have the most amazing organic garden. I bring all this up so everyone will know what pH to use in their foliar and mediums depending on their situation.

Before my cubes are pulled out of the bucket I want to prepare my humidity dome/s for the clones arrival. It’s a good idea to build up some humidity in there especially if you’re a law abiding citizen like J.R. Tokin and clone one cut in a tray all by itself because of some plant count rules. I have cube inserts used to raise the rockwool cube up off the tray floor. Use anything really to get the medium off the tray floor if adding water to tray bottom. No need to add any nutrients. A thin film of water on the trays base will raise the humidity in the dome to perfect within minutes at 75 to 80 degrees F. Never leave a medium sitting in water is why I use the inserts and I’ll explain more on that later. Now that my rockwool cubes have been soaking a few hours and I know the ph buffer is where I want it, I’ll pull each one out slightly tilting it and giving it a gentle squeeze. Once the stream of solution becomes a drip stop.
Gently squeeze out the excess moisture.

Once you see the medium start to drip go ahead and stop.

We want even moisture in the medium. Careful not to squeeze too hard and crush the medium limiting the amount of oxygen it can hold. Roots need moisture and oxygen to survive at all times while the plant’s vegetative matter needs carbon dioxide (CO2) for photosynthesis. Over-saturated mediums will not promote fast root growth. Roots like a semi-dry environment to thrive. They’ll search for moisture and minerals if it’s not delivered like pizza. After you stick your cut in a media, any media, DO NOT water the media until roots are popping out. Roots will take weeks to form if you add water to media every few days thinking you’re helping. I put the cubes in the tray, put on the dome with the vents slightly cracked and then wait about one hour until I see condensation on the dome walls before taking cuts. NEVER completely seal the dome vents.

There needs to be a slight air exchange to create the perfect environment. Depending on the light source and how close it is to the dome’s top will affect things greatly. Worse case with dome vent closed and light source too hot, the clones get cooked in minutes. Wilt. Ambient room temperature is 75 F but with radiant heat from light and no air exchange causes temperature in dome to hit over 90 F in a few hours. Wilt. Even if room humidity is 20% in CO, with water on tray floor and with the dome vents slightly cracked you’ll have perfect 90% humidity in there. Word! 😉


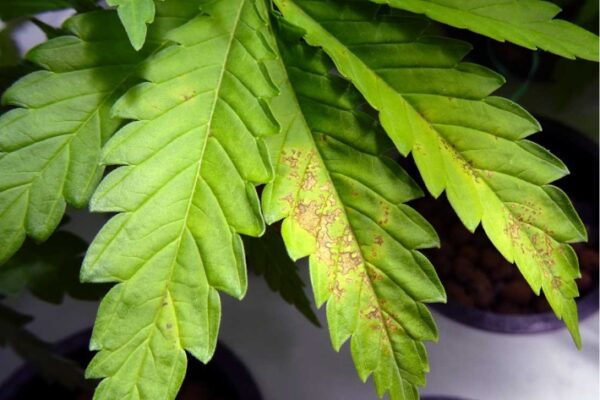
Now it’s time to take some cuts. All the prep work we’ve done up to this point will ensure the cuttings experience the least amount of stress as possible. A quick list of tools i use are as follows. Clean sharp scissors/razor, a spare GH pH test kit plastic tube filled with rooting hormone (IBA), a trash bag for trim, paper towel/s for cleaning blades in between cuts, and some clean hands. This cut came from the top of a young seedling in need of some calcium. See the hollow stem in the picture above? Healthy plants don’t have hollow stems. This is a sign of a calcium deficiency from not enough calcium or not enough trace elements that aid in calcium’s uptake like boron and manganese for example. Calcium relies on several trace elements because it is not a mobile mineral. Mobile minerals like nitrogen can be stored in a leaf and then transferred to more important growth later if needed.

I like to grow all my plants tight and sturdy so I split the main stalk asap. The clones I make don’t need to be tall. I want thick stalks to start. Once they are rooted I want to cut the main stalk just above two new branch site’s above their node. Hopefully two are close together. The example below is from a seedling that has very symmetrical branch sites directly across from each other. Unfortunately experienced growers know this tends to go away in cloned generations causing the branch sites to stagger up the branch. We want to limit that spacing between branches (bud sites) known as internodal spacing. When I make my cut below a node at an angle for more surface area for roots to initiate from while also hoping for at least one or two branch sites to be stripped clean for roots to grow from also. Any wound can grow roots. Don’t leave anything behind to rot like the spurs. cut it all off. If you have a long stem with long node spacing and can’t get a node under the medium without a 6″ bare stem, then you can scrap the stem’s cell walls (skin) making spots for roots to form. Make sure not to leave any scraped material to rot.

After I make my cut and strip off all unwanted material for roots to initiate from, I’ll then trim the leaf tips off the large leaves. This helps in several ways. Cutting the leaf tips lowers the weight of the leaf reducing stress on the plant to hold it up, it make’s more room in the dome for better spacing (leaves can cover heads of other clones blocking their light packed in), and limits transpiration. Leaves transpire moisture through stomata on the leaf surface so less leaf equals less water loss in cut. I’ll then dip the cut in my plastic IBA filled tube and stick it in the rockwool cube until I feel a little resistance from the tip going into the rockwool. Don’t want to press too hard and poke out the bottom. This brings up something very important. The wounds we made on the cutting where we want roots to initiate from could heal if exposed to low humidity. Make sure the stalk comes in good contact with the medium.
If the hole is bigger than the stem then gently press down on the medium around the stalk so it makes good contact. We don’t want that stem’s wounds to heal where we want roots. If this is the case and you’re making more than one clone, wait until all clones are made before doing this. If you do, you might not get the hormone off your fingers before touching another cut’s leaves and you could be sorry. IBA and leaf don’t mix. I keep the dome on the tray until just before I dip the cut in IBA, then quickly stick the cut in the cube. This is a good time to bring up my foliar again. I actually have 3 separate bottles. One with plain 6.0 water with some Cal/mag, one with mainly light NPK, and one with light NPK and kelp (ascophyllum nodosum). While I’m making my cuts I’m just spraying water on them at this point if I spray anything. Most situations in a dome do not require any foliar spraying. You do not want water drops soaking apical meristems (tops).
Every cut gets a spray of water before the dome goes back on. I repeat this process until I have all the cuts I want. I will then spray them all with the kelp mix once they are all in their spots. If you are not using a wetting agent you can spray the clones once or twice a day for the first three days until they “harden off”. The stems should start to firm up and not want to flop over. The first three days the cut will be soft if it was taken off new growth. If it’s a cut from an older lower branch that’s “woody”, then it should stand tall. Older scraggly side branches from side branches is not the kind of start I’m looking for. You get out what you put in. I only clone from branch tops. I grow only the number of branches as I need clones on my mothers. All energy goes to grow my cuts. 😉 If you do have tall cuts that want to lay down until they harden off you can use braces.
Braces can be used for spacing purposes also. I cut pieces of plastic zip ties to make these. I’ll tie the branches down later as they get a little longer.

I’ve made them out of all kinds of things but I’m really liking this green wire. I can twist it to create a round bottom that slides in between the cube and cube sleeve and the other end forks up to support any part of the plant. Bend it as needed. No need for bent stems. After a few days you should remove the braces because water could sit on it causing rot where the brace touches the plant if left on over a week.
Ok what to spray and when to spray it. Get a good sprayer with a fine mist. You do not want puddles of water/solution sitting in the “bowl” of the new growth. This is especially important with any NPK and kelp hormones. Abnormal growth in layman’s terms. Used correctly and the hormones will aid in root formation. Kelp is not needed but can help for sure. I spray once a day with the NPK spray just as the lights are going off at night. If I want to cool them down during the day I’ll spray them with plain water. One of the most important thing’s I can tell the new grower is the leaves do not need to stay wet all the time in the dome. Don’t feel the need to keep spraying the cuts if the leaves are not wet. If they stay wet you will have a very hard time acclimating them out of the dome at a lower humidity. Just know that we are trying to get roots fast as we acclimate the cuts to a lower humidity. As soon as they are rooted in about a week I want them already acclimated to a lower humidity. After the first three days I crack the dome vents open a little more and stop spraying at all with lights on. The idea is to start acclimating the leaves to a lower humidity soon. Make all dome vent adjustments at night and watch for stress. If after 20-30 minutes the cuts aren’t laying down your good for the night. Watch them close the next day for stress expressed in leaf curling. Humidity stress is shown similar to heat stress. The leaves will curl up on the edges and dry out. By day 5 or 6 I should see a few roots poking out. If I do, that night I’ll open the dome vents half way. The first sign of root growth can usually be seen by the base of the stem swelling a bit like a cypress tree in water even though you may not see any roots popping out of the medium yet. After 7 or 8 days I should really see roots popping. At this point I want to really acclimate the leaves so I open the dome vents all the way (at night) and stop spraying anything until they are out of the dome. I make extras but they all should be ready after ten days to be transplanted. One or two might take 10 days to show and those get culled. About day 8 or 9 to acclimate them further I’ll place bamboo in between the dome and tray creating a gap around the tray/dome letting in more air during the dark period. My mother/clone room stays 75-80 F at around 60% humidity +/- 5%. If your room temperature doesn’t stay below 68 F more than a few hours a day/night, then you should never need a heat mat. I’ve never used one before and my room in the winter can get to 65 F during dark cycle. I’d like to get the cuts used to 65%-70% humidity in the dome before removing them.
Just as happy and green coming out as they were going in.


Time to transplant and put The Recharge on…again !!!


As soon as I see root’s that look like the above picture I want to transplant them. If I had to leave them in the tray with a little nutrient on the bottom they would be ok if it was oxygenated. If it wasn’t, the root’s would have moisture but not enough oxygen and start to suffocate. They express this visually as thinning. They should thicken as they grow not grow thin tap roots. Some plants are tough and are not affected by small humidity swings and some will wilt leaves after a 5% change. I can’t tell you the perfect temperature and humidity your plant prefers. You have to grow it a while to learn those things. Rushing to acclimate the clones is where I think most who have trouble go wrong. The end goal is to have the clones looking as good or better going out of the dome than the cuts going into the dome. Keeping your room around 80 F is best I’ve found with most strains. For the first 3 to 4 days out of the dome I will not put a single fan on in the room until I know they have toughened up a bit. Then they are going to catch a beating. 😉 before I end this I do want to touch a little more on aeroponic cloners. I have used them and I’ve also made my own hybrid cloners if need be.
I made this cloner out of an old Canna 5L jug. I made these clone’s to become mom’s. I cut the jug’s pattern out on a thick piece of Styrofoam I had laying around so I could slide the jug in and seal a dome over it. After the cuts rooted I turned this thing into a water culture setup for a few days. Another day in it and I would of had trouble untangling the roots.

I count every watt I use and it’s hard to justify spending money running a water pump on a cycle timer and/or air pumps, etc. I will say if you are using one, spend the money on a good digital cycle timer for best results. Young cut’s can be misted for a few seconds every few hours and full grown plants in a system like this could be fed for 5 seconds every five minutes. If you constantly spray the stem early on, roots will not form quickly. Well DGC I think that about explains most of what i do to make babies. If you have any question’s just ask. Growers <3


Leave a Reply
You must be logged in to post a comment.